Boost Management: Tips and Strategies
In Rocket League, boost is one of the most valuable resources a player can manage. It’s what fuels your speed, enables your aerial plays, and gives you the momentum to outplay your opponents. However, managing your boost properly is often the difference between being in the right position for a goal or being caught out with an empty tank at a crucial moment. Boost management is not just about grabbing the nearest big pad; it’s about knowing when to use it, when to go for it, and how to maintain a consistent level of boost throughout the match.
Mastering boost management will give you a significant edge on the field, allowing you to avoid common mistakes like being too far out of position, missing easy saves, or being unable to apply pressure because you’re low on boost. By consciously practicing these techniques, you’ll eventually incorporate them into your gameplay naturally, making you a more efficient and impactful player.
Boost Mechanics: Respawn Times, Boost Amounts, and More
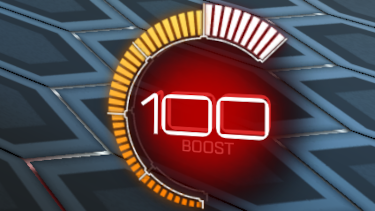
Before diving into the strategies, it's important to understand the mechanics of boost pads in Rocket League. There are two types of boost pads on the field: small pads and large pads. Small pads provide 12 units of boost, while large pads fill your tank completely with 100 boost. The small pads are scattered throughout the field and are often underutilized, despite their quick respawn and cumulative impact.
Small boost pads respawn every 3 seconds, making them an ideal source of continuous replenishment without sacrificing positioning. Large boost pads, found in the four corners of the field and at midfield, respawn every 10 seconds. While they provide a full tank of boost, their longer respawn time and positioning often lead to risky decisions when going for them.
Understanding the respawn timing of both types of pads is crucial to efficient boost management. Keeping mental notes of when boost pads are taken during the game allows you to time your movement and rotations around when they will respawn, giving you a constant stream of boost without taking yourself out of play.
Optimal Timing: When to Use Boost for Maximum Impact
Knowing when to use boost is just as important as having it. The most common mistake players make is overusing boost when it isn't necessary, such as boosting while already at supersonic speed or wasting it on unnecessary aerials. Once you hit supersonic speed, which is visually indicated by the trail behind your car, additional boost does not increase your speed. At this point, you should feather your boost—lightly tap it only when making minor adjustments to maintain speed, rather than holding it down and wasting it.
Boost should be reserved for situations where it provides a clear advantage. For example, when contesting the ball, boost can help you reach the play faster than your opponent. Likewise, it's essential for making aerial plays, recovering quickly after a challenge, or getting back on defense to prevent a goal. However, if you're using boost to get to a ball only to lose the challenge or overcommit, you’re left vulnerable and often out of position.
A key part of effective boost usage is awareness. Before committing to an action, assess whether you have a better position than your opponent or teammate. If the answer is no, it's often better to conserve boost and maintain position. Developing this awareness takes time, but once you can instinctively judge whether to boost or hold back, you’ll find yourself being more efficient and impactful during play.
Boost Efficiency: How to Make Every Boost Count
Boost efficiency is about getting the most out of the boost you have. Every player starts with a limited amount, and wasting it on unnecessary movements or poor decision-making can leave you in a vulnerable position. The goal of boost efficiency is to achieve the same outcome—whether it’s reaching the ball first, maintaining momentum, or executing an aerial—using as little boost as possible.
One of the most effective ways to conserve boost is through feathering. Feathering refers to lightly tapping the boost button rather than holding it down continuously. This technique is especially useful in aerials, where short bursts of boost are often enough to maintain control and positioning in the air, saving you precious boost for later in the play. Aerials that waste boost tend to leave players with little to no boost upon landing, reducing their ability to stay active in the game.
Another essential technique is flipping. When driving across the field, flipping forward not only helps you maintain momentum but also conserves boost. Two forward dodges from a standstill can get you to supersonic speed just as fast as holding boost, and without burning through your reserve. Combine this with collecting small boost pads as you move, and you’ll find yourself with a more consistent boost supply throughout the game.
Efficient boost use also means understanding when it’s necessary to burn more boost for certain plays. For instance, going for a high-speed challenge, making a game-saving aerial, or capitalizing on a fast break are all scenarios where spending a bit more boost is justified. However, players must strike a balance between aggressive boost usage and maintaining enough reserve to reposition or defend. The more efficiently you use boost, the longer you can stay active on the field without scrambling to find the next big pad.
Boost Pathing: The Best Routes to Keep Your Tank Full
Boost pathing refers to the practice of collecting small boost pads as you move around the field, ensuring that your boost levels remain high without leaving critical positions. Knowing the layout of the field’s boost pads and incorporating them into your movement is essential for consistent boost management. This approach allows you to stay involved in the play while constantly replenishing your boost, avoiding the need to rely on the larger, often-riskier big boost pads.
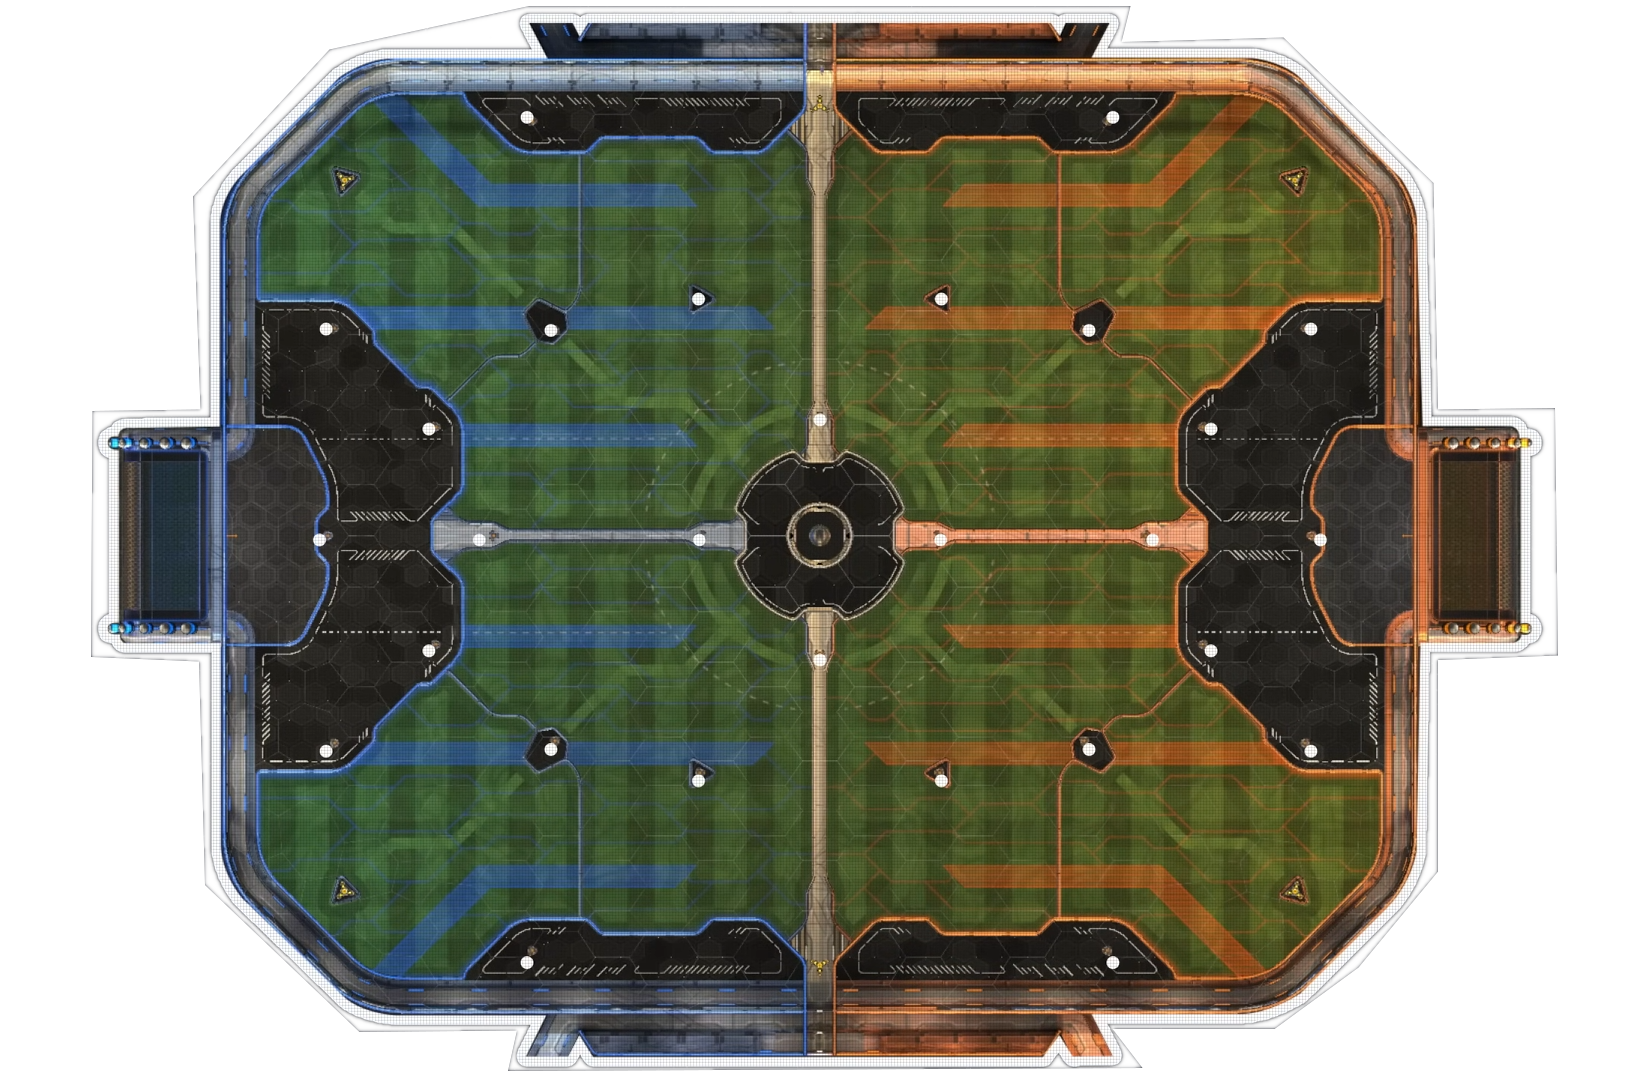
Effective boost pathing is crucial for maintaining momentum and efficiency on the field. There are several key paths that players can utilize to navigate the field, each designed for different movement needs. The Center Lane (or Middle Line) is ideal for quickly transitioning from one side to the other, especially when moving out of goal.
The Oval Path (or Diamond Line) forms the largest boost pad loop and is perfect for moving up or down the field, typically allowing players to collect 36 to 48 boost units—about half the pads in the loop. For diagonal movement, the X Path runs across the field, letting players pick up 4 small pads while maintaining speed and positioning.
Another useful path is the Defender’s Arc, which consists of a semi-circle of 4 small pads plus one centered pad in front of the net. This path is particularly useful for holding the defensive center zone, providing quick access to boost while staying in a strong position to defend against shots or make clears. Small boost pads are strategically placed around the field allowing players to fluidly collect them during rotations.
Mastering these paths is essential to keeping boost levels high without sacrificing positioning or momentum. For instance, when rotating back on defense, driving over two or three small pads will often provide enough boost to challenge the ball or position yourself for a save without having to rush to a corner for a large boost pad. The key to mastering boost pathing is consistent practice—driving over small pads while staying in ball cam mode during free play helps build the habit, allowing you to stay engaged with the game while collecting boost.
Players who can instinctively collect boost while maintaining their positioning and momentum can stay relevant on the field, constantly applying pressure and quickly reacting to changes in the game. This skill separates experienced players from those who struggle with boost starvation, as mastering boost pathing ensures you always have enough boost to make plays and stay in the flow of the game.
Strategic Boost Control: The Power of Stealing and Denying Boost
Strategic boost control is another key element of boost management, particularly at higher levels of Rocket League play. It involves not only managing your own boost but also limiting your opponent’s access to it. This tactic, known as boost starving, is a powerful strategy that can cripple the opposing team’s ability to maintain pressure, recover quickly, or make effective plays.
Boost starving typically involves stealing the opponent’s corner boost pads while rotating through their half of the field. By depriving them of these 100-boost pads, you limit their ability to go for aerials, recover from challenges, or move quickly to counterattack. However, timing is crucial when boost starving—don’t go for the opponent’s boost if it means leaving your team vulnerable to a counterattack. Make sure you’re not abandoning your position to grab boost; instead, incorporate it into your rotation when you have time or after completing a play.
Boost denial works on both offense and defense. On offense, after making a play or pressuring your opponent’s defense, taking their corner boost can leave them scrambling to maintain possession or make a save with limited resources. On defense, it’s important to secure your own boost pads, ensuring that you and your teammates have the resources to recover and defend properly.
Boost control also includes recognizing when it’s better to leave a boost pad for a teammate. In situations where you have enough boost and a teammate doesn’t, it’s often better to rotate out and allow them to pick up the big boost. This small act of teamwork ensures that your entire team stays well-supplied and able to maintain pressure or recover when needed.
Effective boost control can shift the momentum of a game, as opponents who are starved of boost are often forced to play defensively, unable to commit to high-risk plays or quick recoveries. Mastering this skill gives you a strategic advantage, allowing your team to dictate the pace of the game.
The Big Boost Decision: When to Prioritize Large Boost Pads
Large boost pads, which provide 100 boost, are tempting due to their ability to instantly refill your tank, but knowing when to prioritize them is a crucial aspect of boost management. Grabbing a large boost pad at the wrong time can leave your goal exposed, disrupt your team’s rotation, or take you out of a play when you’re needed most. The key is understanding when it’s safe and strategic to go for these big pads.
On defense, it’s generally risky to abandon your position to grab a large boost pad, especially when the opponents are pressuring your goal. A safer option is to collect small boost pads, which are scattered across the field, allowing you to stay in position while still replenishing your boost. These small pads often provide enough boost to make a save, clear the ball, or rotate without completely vacating your role.
On offense, the decision to go for a large boost pad is often more flexible. After completing an attacking play or rotating out as the first man, grabbing a big boost pad in the opponent’s corner can help you stay involved in the game while also starving their defense of resources. However, even on offense, it’s important not to be too greedy. If the play shifts or your team is at risk of a counter-attack, staying in position and collecting small pads is often the better decision.
Timing is everything when it comes to the big boost decision. If you’re going for a big pad, ensure that your team is covered defensively or that you’re not abandoning a critical role. Additionally, knowing the respawn times of big boost pads (every 10 seconds) can help you plan your rotations effectively, allowing you to anticipate when a pad will be available and position yourself accordingly.
In summary, the large boost pads are a valuable resource, but over-prioritizing them can lead to poor positioning and missed opportunities. Learning to balance when to go for a large boost and when to rely on smaller pads is key to staying effective and ensuring your team’s success.
Table of Content
- Introduction
- Boost Mechanics: Respawn Times, Boost Amounts, and More
- Optimal Timing: When to Use Boost for Maximum Impact
- Boost Efficiency: How to Make Every Boost Count
- Boost Pathing: The Best Routes to Keep Your Tank Full
- Strategic Boost Control: The Power of Stealing and Denying Boost
- The Big Boost Decision: When to Prioritize Large Boost Pads
Training Drills
No related training articles found.
Recent Posts

Introduction to Positioning in Rocket League
21 Jan 2025About Us
The Boostpad is your ultimate resource for all things Rocket League.
If you find it useful, please share with your teammates and invite them to join our Discord community!